




The 6th Gen Toyota 4Runner Trailhunter is an impressive off-road platform straight from the factory. But for owners looking to improve their vehicle’s stance and customize their suspension setup, the right lift kit can make a significant difference.
At Westcott Designs™, we develop precision-engineered suspension solutions designed around the vehicles they’re built for.
Our 6th Gen Toyota 4Runner Trailhunter lift kit and billet top hat offer a vehicle-specific approach to adjusting suspension ride height while working with compatible factory suspension components.
In this guide, we’ll cover what to know before installation, how to prepare your vehicle, and the important checks involved in installing a Westcott Designs™ lift kit and top hat.
We’ll also walk you through the general installation stages and explain why measuring your 4Runner before and after the upgrade is so important.
Watch: 4Runner Trailhunter Lift Kit & Top Hat Installation
Watch the Westcott Designs™ Step-by-Step Installation Video
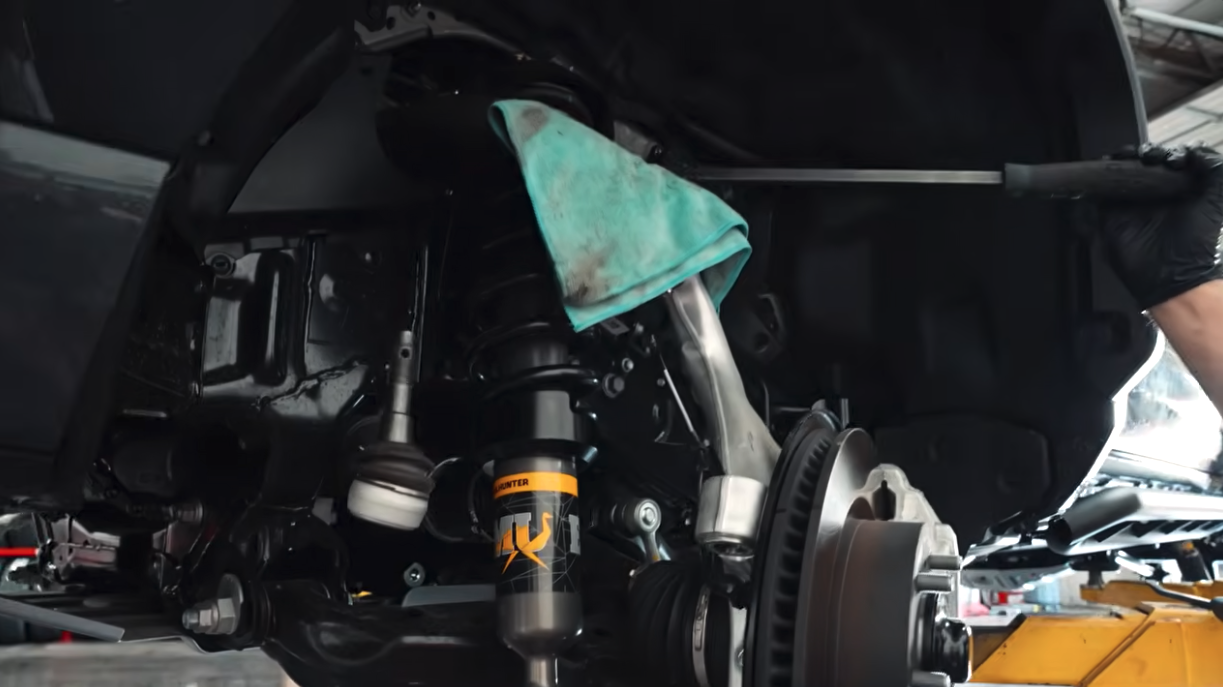
This video demonstrates the installation of the Westcott Designs™ lift kit and top hat on a 6th Gen Toyota 4Runner Trailhunter.
Follow the video alongside the official product instructions for the exact component removal, installation sequence, hardware requirements, and torque specifications.
What Is the Westcott Designs™ Trailhunter Lift Kit?
The Westcott Designs™ lift kit is designed to provide a suspension upgrade option for compatible 6th Gen Toyota 4Runner Trailhunter models.
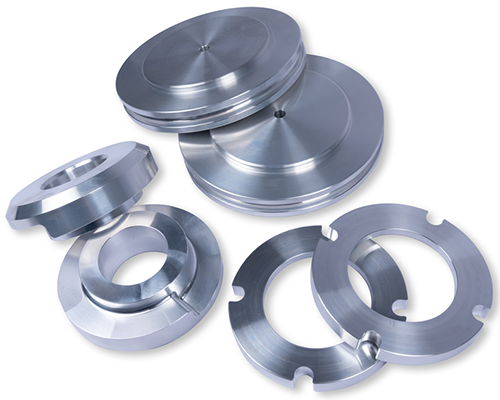
The setup includes a preload collar and a billet top hat component.
These components work with the compatible suspension assembly to change the vehicle’s ride-height configuration.
Preload Collar
The preload collar changes the installed position and preload of the coil spring within the compatible shock assembly.
This can raise the vehicle’s static ride height without requiring a complete replacement of the suspension system.
The actual lift achieved depends on suspension geometry, vehicle configuration, accessory weight, and other factors.
Billet Top Hat
The billet top hat provides an additional configuration option for the front suspension assembly.
As shown in our other Trailhunter build walkthroughs, Westcott Designs™ offers a billet top hat with a half-inch lift provision for compatible applications.
The correct configuration should be selected based on the product instructions and the desired vehicle stance.
A half-inch component dimension should not automatically be interpreted as exactly half an inch of additional ride height at the wheel.
Before You Install: Measure Your 4Runner’s Factory Ride Height
One of the most important recommendations we make at Westcott Designs™ is to measure your vehicle before installing suspension components.
This gives you an accurate starting point and helps determine the final stance you want to achieve.
Step 1: Park on a Level Surface
Park your Trailhunter on a level surface with the tires properly inflated.
Keep the vehicle in a consistent loading condition for both the before-and-after measurements.
Step 2: Measure All Four Corners
Measure vertically from the center of each wheel hub to the corresponding fender opening.
Record the measurements for the front driver, front passenger, rear driver, and rear passenger sides.
Step 3: Compare Front and Rear Ride Height
Compare the front and rear measurements to understand the vehicle’s existing stance.
Some owners prefer a level appearance, while others want to retain a slight rear rake to accommodate cargo and equipment.
Step 4: Determine Your Desired Configuration
Review the available lift kit and top hat configurations before installation.
The correct setup depends on your vehicle, the desired stance, and the manufacturer’s compatibility requirements.
Tools, Equipment, and Safety Considerations
Suspension work involves components that support substantial vehicle loads and may contain stored spring energy.
Before beginning the installation, ensure that you have the proper equipment and experience.
Depending on the exact procedure, the job may require:
- A vehicle lift or appropriately rated jack and jack stands
- Wheel chocks
- Manufacturer-specified hand tools and sockets
- Calibrated torque wrenches
- Appropriate equipment for handling suspension assemblies
- A suitable spring compressor if required by the official procedure
- The complete Westcott Designs™ installation instructions
Important: Compressed coil springs can release dangerous amounts of stored energy. Do not loosen a loaded spring assembly or remove its retaining hardware without the appropriate equipment, training, and manufacturer-approved procedure.
If you’re not experienced with suspension work, we recommend having the kit installed by a qualified technician.
6th Gen 4Runner Trailhunter Lift Kit Installation: General Overview
The following stages explain the overall installation workflow. They are not a substitute for the exact mechanical steps demonstrated in the video or the official Westcott Designs™ instructions.
Step 1: Confirm Vehicle and Kit Compatibility
Before disassembly, verify that the lift kit and top hat are designed for your Trailhunter’s specific suspension configuration.
Check the kit contents and confirm that all required hardware and components are present.
Step 2: Secure and Prepare the Vehicle
Follow the vehicle manufacturer’s approved lifting and support procedures.
The vehicle must be securely supported before suspension components are disconnected.
Review the installation video to identify which components require removal or repositioning.
Step 3: Access the Front Suspension Assembly
The installation involves working with the front suspension assembly.
Use the Westcott Designs™ video and official instructions to identify the required access points, disassembly sequence, and any components that must be temporarily removed.
Do not disconnect suspension or steering components without understanding how they are supported and how they must be reassembled.
Step 4: Install the Preload Collar
The Westcott Designs™ preload collar is installed as part of the compatible shock and spring assembly.
Its positioning affects the spring’s installed preload and the resulting suspension configuration.
Follow the exact product-specific instructions for component orientation, spring handling, and installation.
Never attempt to remove or replace a loaded spring seat without the appropriate spring-handling equipment and approved procedure.
Step 5: Install the Billet Top Hat
The billet top hat is installed in the specified position within the suspension assembly.
Verify that the component is correctly oriented and that the required hardware is installed according to the manufacturer’s instructions.
Use the exact sequence and torque specifications provided for the product.
Step 6: Reinstall the Suspension Assembly
Once the components are correctly installed, the suspension assembly must be reinstalled following the specified procedure.
All mounting points, fasteners, and surrounding components should be checked for proper fitment.
Some suspension fasteners may require final tightening at a specified ride-height position. Follow the applicable vehicle and product instructions.
Step 7: Check Clearances and Component Positioning
Before returning the vehicle to service, inspect the installation for proper clearance and alignment.
Pay particular attention to brake hoses, electrical wiring, suspension joints, and other nearby components.
Confirm that no components are stretched, pinched, or positioned where they could interfere with suspension or steering movement.
Step 8: Measure the Finished Ride Height
Once the vehicle is safely returned to its normal ride position, repeat the measurements recorded before installation.
Compare the results to determine the actual change in ride height.
The final stance may vary based on the vehicle’s configuration and loading.
Step 9: Complete a Professional Wheel Alignment
Changing suspension ride height can affect wheel alignment.
After installation, have the vehicle’s alignment inspected and adjusted as required by the manufacturer’s specifications.
A professional post-installation inspection should also verify the condition and security of the suspension components.
Why the Billet Top Hat Configuration Matters
Not every 4Runner owner wants the same stance.
Some prefer a level front-to-rear appearance, while others want to retain a small amount of factory rake.
The billet top hat configuration provides an additional option when setting up a compatible suspension system.
However, selecting the right configuration requires understanding the vehicle’s starting measurements and intended use.
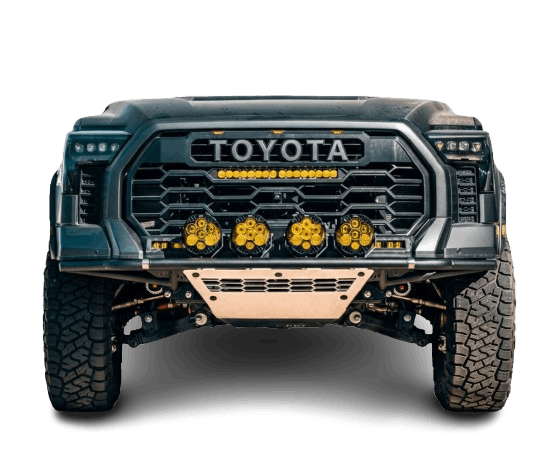
For example, a 4Runner equipped with additional front-end accessories may sit differently from an otherwise identical vehicle without those accessories.
Likewise, carrying heavy cargo in the rear can change the vehicle’s static ride height.
That’s why we encourage owners to consider the complete vehicle setup rather than choosing lift components based only on photographs.
Does a Preload Collar Lift Change Ride Quality?
This is one of the most common questions surrounding preload collar lift kits.
A preload collar changes the installed preload of the coil spring and can change the suspension’s static operating position.
For a linear-rate coil spring, changing preload does not change the spring’s inherent rate.
However, altering ride height and preload can affect available suspension travel, droop, and the position in which the shock operates.
That means ride characteristics can change even when the factory shock assembly is retained.
Additional modifications, such as heavier tires, aftermarket bumpers, roof racks, and cargo, can also influence vehicle dynamics.
For the best results, suspension upgrades should be selected with the vehicle’s complete configuration and intended use in mind.
Common Trailhunter Lift Kit Installation Mistakes to Avoid
Skipping the Initial Measurements
Without before-and-after measurements, it’s difficult to determine the actual ride-height change or evaluate the final stance.
Selecting Components Based Only on Appearance
Two Trailhunters may look similar but have different equipment, loading conditions, and suspension requirements.
Always confirm the correct kit configuration for your vehicle.
Using Incorrect Torque Specifications
Suspension hardware must be tightened according to the applicable manufacturer requirements.
Do not guess torque values or substitute generic specifications.
Overlooking Suspension and Steering Clearance
Changes in ride height can affect the relationship between suspension components and nearby vehicle systems.
Proper clearance checks are essential.
Skipping the Post-Installation Alignment
An alignment inspection is an important part of completing a suspension modification.
It helps identify geometry changes and supports proper tire wear and vehicle handling.
Why Choose Westcott Designs™ for Your Toyota 4Runner Suspension?
At Westcott Designs™, suspension development is about more than simply raising a vehicle.
We focus on designing components that complement the intended platform while giving owners practical options for their builds.
Our team works with Toyota trucks and SUVs every day, providing firsthand experience with different suspension systems, wheel and tire packages, and vehicle configurations.
That experience helps inform our product development and installation recommendations.
We also provide installation videos and technical resources to help customers better understand the components they’re installing.
Whether you’re upgrading your Trailhunter at home or having the work completed by our installation team, our goal is to help you make informed decisions about your vehicle.
Frequently Asked Questions About the 4Runner Trailhunter Lift Kit
Can you install a lift kit on a 6th Gen Toyota 4Runner Trailhunter?
Yes. Westcott Designs™ offers a lift kit and billet top hat solution for compatible 6th Gen Toyota 4Runner Trailhunter models. Confirm the specific suspension configuration and product fitment before installation.
What does the Westcott Designs™ preload collar do?
The preload collar changes the installed position and preload of the compatible coil spring assembly. This can increase static ride height while retaining compatible factory suspension components.
What is the purpose of the billet top hat?
The billet top hat provides an additional suspension configuration option. Westcott Designs™ has demonstrated a half-inch top hat provision in its Trailhunter builds, allowing additional flexibility when setting the desired stance.
Do I need to measure my Trailhunter before installing a lift kit?
Yes. Recording ride-height measurements before installation helps establish the vehicle’s factory stance and provides a reference for evaluating the final result.
Does a Trailhunter lift kit require an alignment?
A professional alignment inspection is recommended after suspension ride-height modifications. Adjustments should be made as necessary to meet the applicable vehicle specifications.
Can I install the Westcott Designs™ lift kit myself?
Installation may be suitable for experienced mechanics with the correct tools and spring-handling equipment.
Does installing a preload collar lift change the spring rate?
A preload adjustment does not change the inherent rate of a linear coil spring. However, it can change static ride height, suspension travel position, and vehicle ride characteristics.
Upgrade Your 6th Gen Toyota 4Runner Trailhunter with Westcott Designs™
Whether you’re looking for a more level stance or preparing your vehicle for additional off-road upgrades, choosing compatible, thoughtfully engineered suspension components is an important first step.
Explore Westcott Designs™ Suspension and Off-Road Accessories
Watch More Westcott Designs™ Installation Videos
Build it right. Take it further.