


Leveling a new Toyota the right way doesn’t start with a lift kit. It starts with understanding your factory suspension, how Toyota engineered the front strut, and where most people get tripped up during an install.
In these two install videos, Westcott Designs™ walks through preload collar and billet top-hat installs on two of Toyota’s most talked-about platforms:
-
The 2025 6th Gen Toyota 4Runner TRD Off-Road
-
The 2024+ 4th Gen Toyota Tacoma TRD Off-Road
Both installs follow the same philosophy:
use hand tools, understand the two-piece shock shaft, and don’t rush the details that protect long-term ride quality.
This guide pulls together the key lessons from both videos so you know exactly what to expect before turning a wrench.
Why Preload Collars Are the Right First Upgrade
Preload collars are one of the smartest early suspension upgrades you can make on a new TRD Off-Road. Instead of replacing the entire strut or stacking questionable spacers, preload collars work with the factory shock to achieve lift while maintaining proper geometry.
Benefits include:
-
Corrected front rake without over-lifting
-
Retained factory shock valving and ride quality
-
Improved stance for larger tires
-
A clean foundation before sliders, armor, or full suspension upgrades
Paired with a billet top-hat spacer, preload collars allow proper misalignment correction and safe reassembly of the factory strut.
The Critical Detail Most Install Guides Miss: The Two-Piece Shock Shaft
Both the 6th Gen 4Runner and 4th Gen Tacoma use a two-piece shock shaft design. This is where most DIY installs go sideways.
At first glance, the top of the shock looks like a single shaft. It’s not.
The upper section is threaded onto the lower shock shaft, often secured with factory thread locker. If you don’t know where the separation point is or how to secure it correctly, you risk:
-
Spinning the internal shock shaft
-
Damaging the shock seal
-
Creating leaks that shorten shock life
Jeff’s walkthrough focuses almost entirely on this step — because it’s the one that matters most.
2025 6th Gen Toyota 4Runner TRD Off-Road Install Breakdown


For the new 6th Gen 4Runner, the process starts with a fully removed factory strut assembly.
Key Steps and Tips
1. Secure the Shock Shaft Correctly
-
Use a vise with aluminum soft jaws if possible
-
Clamp as close to the upper section as possible to avoid damaging the portion that enters the shock body
-
Avoid marring the shaft at all costs
2. Break the Upper Shaft Free
-
Use a 14mm wrench on the flats
-
Keep a hand on the shock shaft to feel if it starts spinning
-
Heat may be required to release factory thread locker, but it’s not always necessary
3. Remove Factory Components
-
Pop off the dust shield
-
Knock off the factory preload collar (expect adhesive residue)
4. Install the Westcott Preload Collar
-
Ensure the seated edge fully mates with the shock body
-
Rotate the dust cover until it bottoms out and seats evenly
5. Reassemble with the Billet Top-Hat Spacer
-
Westcott’s spacer is flat on both sides for proper wrench engagement
-
The added height is designed to still engage the factory nyloc nut
-
Red thread locker is used during reassembly
6. Final Assembly
-
Spring compressors are reinstalled
-
Tension is released to load the shock shaft
-
Final tightening is done once load prevents shaft rotation
The result is a properly assembled strut that levels the front without compromising ride or reliability.
2024+ 4th Gen Toyota Tacoma TRD Off-Road Install Breakdown


The Tacoma install follows the same fundamentals but highlights how stubborn factory thread locker can be on newer trucks.
Key Differences and Callouts
-
An 8mm wrench is used on the top of the shock
-
Heat is often required to break the upper shaft free
-
Extra care is taken due to how easily damage can cause seal failure
Tacoma-Specific Lessons
-
Never clamp the shaft where it enters the shock seal
-
Expect adhesive holding the factory collar in place
-
Always confirm the new preload collar is fully seated on its internal shelf
-
Apply red Loctite during reassembly
-
Final tightening happens after spring load is applied to prevent internal rotation
This process ensures the billet top-hat and misalignment spacers seat correctly, preventing noise, wear, or alignment issues later.
Why the Billet Top-Hat Spacer Matters
Both installs rely on a billet top-hat spacer with built-in misalignment correction.
This isn’t just about lift. It’s about:
-
Maintaining proper suspension angles
-
Ensuring hardware fully engages the nyloc nut
-
Preventing long-term clunking or premature wear
Skipping this step or using poorly designed spacers often leads to problems down the road — especially once larger tires or off-road loads are introduced.
Hand Tools, Not Shortcuts
One of the most important takeaways from both videos is this:
You don’t need an impact to do this right — but you do need patience.
Hand tools let you feel when the shaft begins to rotate, which is the difference between a clean install and a damaged shock. Impacts are used at the very end, only once proper load is applied.
When to DIY — and When to Ask for Help
If you’re a home installer:
-
Take your time
-
Use soft jaws
-
Don’t skip heat if thread locker won’t release
If you’re a shop:
-
These installs are repeatable and efficient once you understand the shaft design
-
Westcott is always available to walk through the process and answer questions
The goal isn’t just to get lift — it’s to get it right.
Watch the Full Install Videos
2025 6th Gen 4Runner TRD Off-Road Preload Collar & Top-Hat Install
2024+ 4th Gen Tacoma TRD Off-Road Preload Collar & Top-Hat Install
Both videos show the real-world process, mistakes to avoid, and details that most install guides leave out.
Shop Westcott Designs™
If you’re planning your build or leveling your truck before tires, explore Westcott’s full lineup:
-
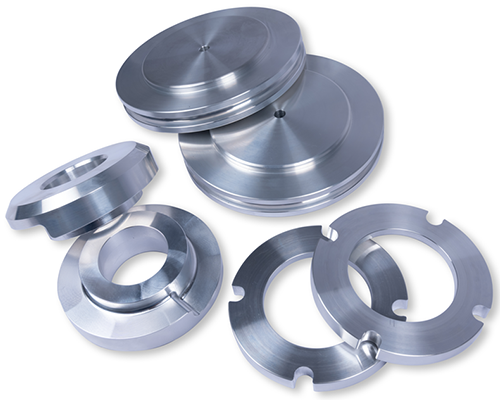
Suspension components
-
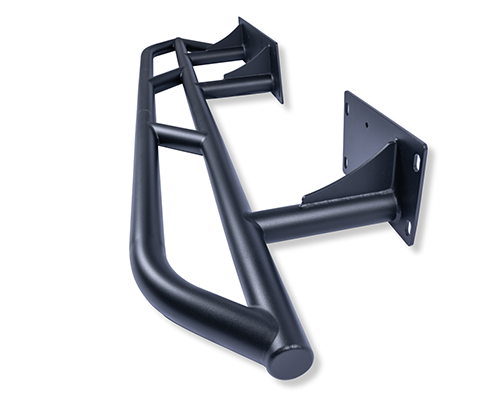
Sliders
-
Roof racks
-
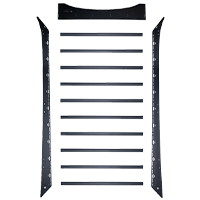
Ladders
-
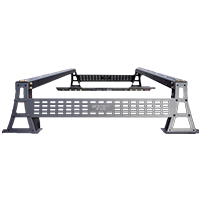
Bed racks
-
Merch
Built, tested, and installed by people who actually use their trucks.
Built different. Installed right.